BLACK FRIDAY SALE ENDS IN:
BLACK FRIDAY SALE: Get Your Special Discount for EASYDSLR COMPLETE PACKAGE that includes EASYDSLR BLUE and EASYDSLR GOLD Courses AND 2 HUGE BONUSES (details below)
Give your Photography a Huge Boost: Go from the Essentials to Creative Shooting with your DSLR or Mirrorless Camera
Click Below for Full Access to the COMPLETE PACKAGE for ONLY $39.95 (FULL PRICE $289.99)
Don't Leave Empty Handed!
Get the Black Friday Special on EASYDSLR Blue Membership
Dear Friend,
Maybe the EASYDSLR Complete Package is more than you require right now.
Rather than walking away empty handed, I would like to give you the opportunity to grab EASYDSLR Blue Membership at a Special Black Friday Rate.
Instead of struggling with your camera and the key settings to get great photos, Blue Membership will give you the foundational training you need to start mastering your camera. It introduces The Photo Triangle™ - your map to understanding the fundamentals required to raise the level of your photos and enter into the creative zone.
This EXCLUSIVE Deal will be for this Black Friday Weekend ONLY - so click the YELLOW button below to get started now:
Price $149
From: Ken Schultz
RE: BLACK FRIDAY Epic EASYDSLR COMPLETE PACKAGE Sale
Hey, Ken here!
Almost through 2023! A strange year indeed with inflation, wars and economic turmoil. I hope you have faired well.
If you had more time on your hands maybe you got to pick up your camera on occasion!
Talking of your camera, if you feel the money you have spent on your camera gear has been somewhat wasted - or at least not used to it's potential - and are concerned that your photography is not up to speed, what I have below can help!
There is no substitute for getting the fundamentals in Photography.
That's why I am super happy to Bring you my BEST BLACK FRIDAY Offer...
The EASYDSLR COMPLETE PACKAGE - that includes EASYDSLR BLUE Course, EASYDSLR GOLD Course as well as 2 Awesome BONUSES (see more about that below).
The COMPLETE PACKAGE is more than enough to give you the training you need to raise the bar on your photography.
Creating awesome Images has 2 Main parts, or two sides of the coin...
On one side it's about knowing the Settings and Techniques so you can get the Best RAW materials for a Great Photo - it's important to make sure you have captured a good Exposure, Focus where you want it (or Blur for that matter) and a pleasing arrangement of objects or subjects in the shot.
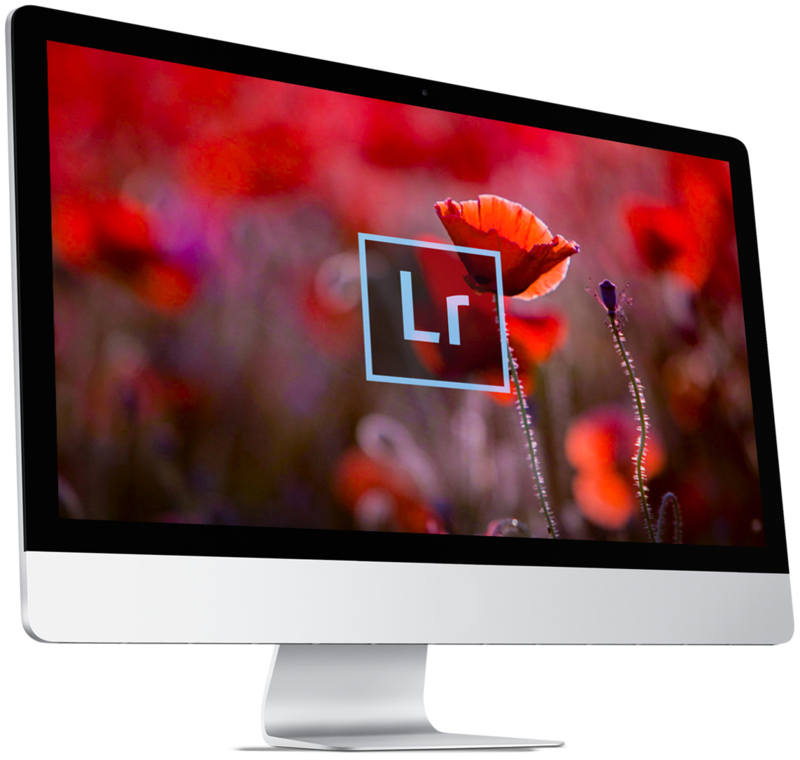
The other side is taking the RAW photo (literally I use the RAW format) and then Producing the Best possible Image by using Editing Software (like Adobe Lightroom's Tools).
So I'm not always trying to get everything perfect IN CAMERA but I am aware of what I DO need to get right when taking the photo and what can be done in Post Processing to create a Fantastic Image.
That is why I am so excited to bring you this Offer of my EASYDSLR Blue Membership Course that will give you a FAST TRACK to capturing Images with Professional POTENTIAL, my EASYDSLR Gold Membership Course that adds Creative Techniques, Image Editing and HD Video using a DSLR,...
...as well as my ADOBE Lightroom for Beginners Course (hosted on Udemy) to REALIZE the Potential of your Photos and Create Amazing Images.
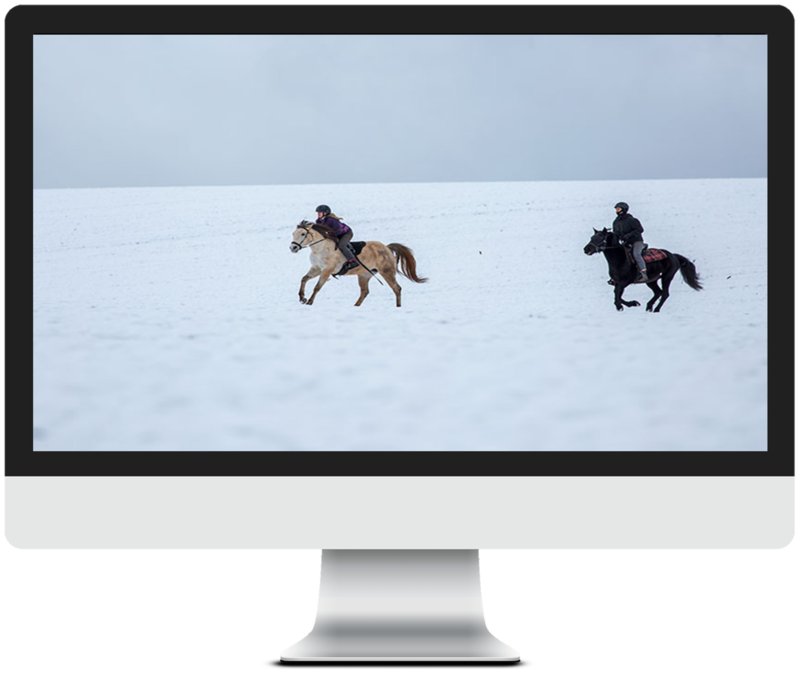
Also included, is an Advanced Tutorial (in layman terms of course!) that covers shooting in Challenging Exposure and Focus situations. Using the Core Principles from your EASYDSLR Blue lessons including the Photo Triangle™ we take on an advanced Snow Shoot to give you a practical example of the Challenges Photographers can face and how to Overcome them!
Having BOTH the Fundamentals for Capturing Great Shots and the Key Techniques in Adobe Lightroom along with discovering How to overcome Challenging situations will give your Photos a Huge Boost... and will truly lead you towards Professional Looking Images!
I invite you to take up this fantastic BLACK FRIDAY offer.
Scroll down the page to see all the extra topics and techniques you will discover.
Hopefully as the world opens up we will get to travel and take more photos - knowing the basics from my course will give you confidence to push the creative limits of your camera!
Cheers

Ken Schultz
Photographer and DSLR Coach
BLACK FRIDAY SPECIAL
EASYDSLR COMPLETE PACKAGE!
EASYDSLR BLUE COURSE
(Valued at $149)
EASYDSLR GOLD COURSE

(Valued at $67)
INCLUDES THESE 2 AWESOME BONUSES - THIS WEEK ONLY!
BONUS 1: Special Tutorial Video "CONQUERING CHALLENGING EXPOSURE AND FOCUS" (valued at $39)
BONUS Video Lesson ($39 Value)
- Discover BEST Exposure Mode for Tricky Lighting
- How to get the Shutter Speed you want with Consistent Exposure
- Find out how to get Sharp Focus with Action Subjects
BONUS 2: First 500 Buyers receive "ADOBE LIGHTROOM FOR BEGINNERS" Course
BONUS Full Course For first 500 Buyers ($34.99 value)
- LifeTime Online Access to Udemy Hosted Course
- UnCover the Real Potential of Your Photos
Total Price $289.99
includes HD Downloads of ALL VIDEOS
60 Days No Questions Asked Guarantee
I have a No Nonsense Guarantee: If you watch the Videos in this Course and find that either: Your Photos are not Improving through applying what you learn, You don’t like my Accent 🙁 or for any Reason you are not happy with the Course send me an email in 60 Days of Buying and I will refund every cent you payed – no questions asked!
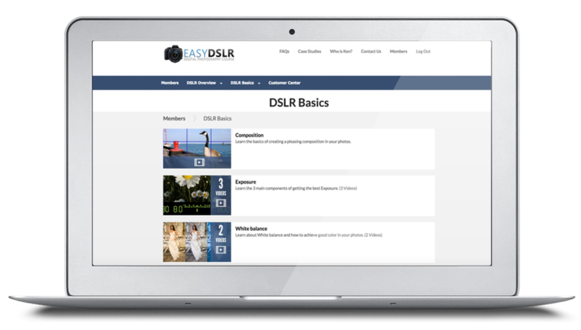
Here's What You Get with Your BLUE COURSE
On Your Membership HOME Page you will find Your ORIENTATION Video that gives you an Overview of the whole course and shows you The Photo Triangle - the "Map" that shows you how all the Main Principles are connected to produce a Great Photo!
DSLR Overview module
-
1
What's a DSLR?
Video Length: 17 min 26 seconds
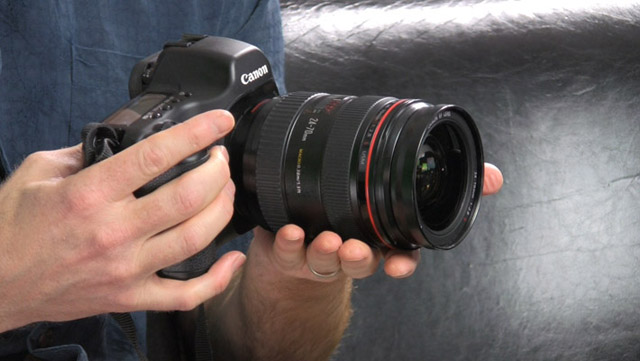
Take a Tour of your DSLR camera and Discover How it's going to help you take fantastic photos:
- Clear and Straightforward Tour of your DSLR that will instantly prepare you for great photos
- The Honest Truth why DSLR cameras are better than Point-and-shoots
- How to Gauge the Value of your DSLR and use it to it's potential
-
2
DSLR Essentials
Video Length: 10 min 00 seconds
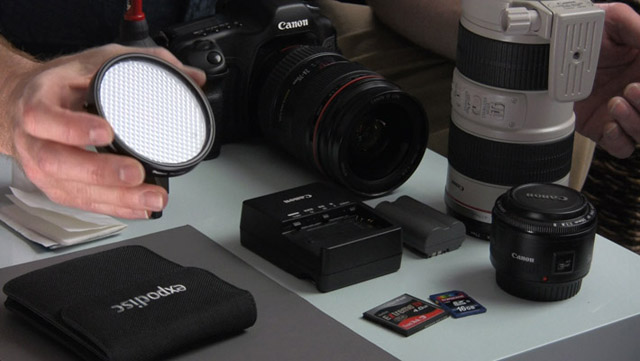
Learn the Essential items you MUST have in your DSLR Kit for any Photo Shoot:
- The Only DSLR Essentials Check List you need
- The details about what you NEED in Your DSLR Kit and Why
- Discover other "Essentials" will give you the edge in creating amazing photos
DSLR BASICS Module
-
3
Composition
Video Length: 38 min 50 seconds
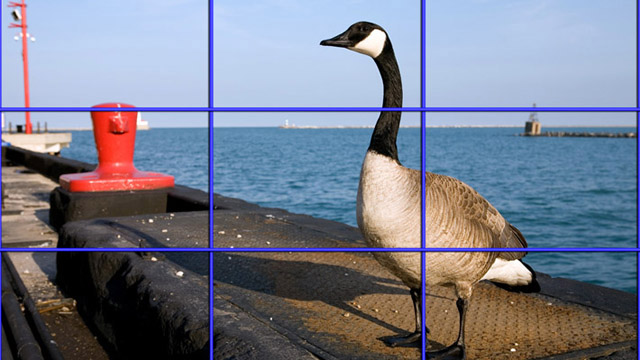
This video deals with the FRAME part of The Photo Triangle including:
- What every photography should know about Focal Length
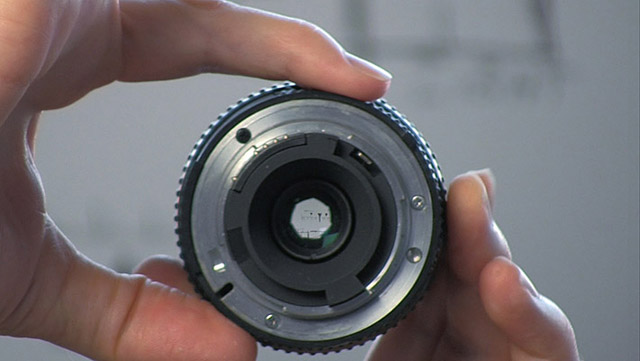
- What Key differences separate Primes from Zoom lenses and how that will help your photography
- How to use the Ancient Secrets of the GOLDEN MEAN to get amazing Composition
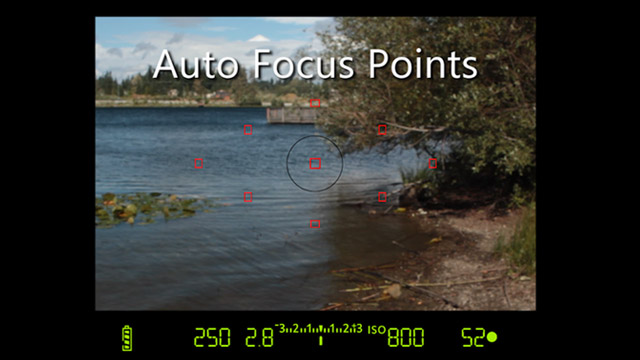
- A Surprising way to use Autofocus Points to Improve your Compositon Overnight
-
4
Intro and ISO
Video Length: 22 min 27 seconds
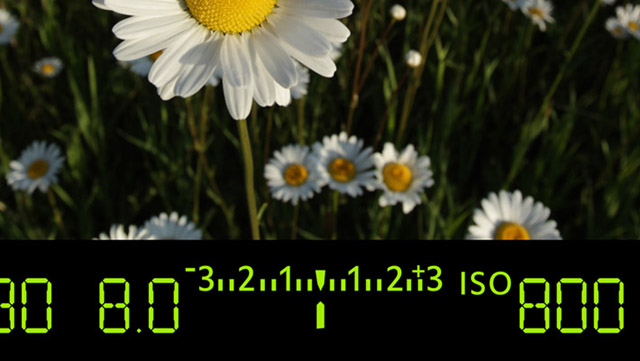
The Essentials of Exposure explained and the LIGHT corner of the Photo Triangle, including:
- The Vital Importance of Exposure Metering Modes
- Why the Dynamic Range of your DSLR Sensor MATTERS
- Get far better Exposure in your images using the secrets of the Histogram
- The Demystifying Truth about "Correct” Exposure and Artistic Choice
- The little-known way of understanding ISO and how it can help your Exposure
-
5
Aperture
Video Length: 9 min 43 seconds
This Video explains Aperture a Key setting that affects Exposure (LIGHT corner of The Photo Triangle), including:
- Everything you could ever want to know about Aperture
- Why understanding the Light Path to your DSLR Sensor will help you grasp the fundamentals
- How Lens “Speed” of your lens is critical to know for creative photos
- Why you should never consider staying on AUTO and how Aperture Priority Mode is your stepping stone
- How to use Aperture to affect Depth of Field for awesome photos (more details in Depth of Field video in Focus section)
-
6
Shutter Speed
Video Length: 39 min 45 seconds
We will look at Shutter Speed – another key setting that affects Exposure (in the LIGHT corner of The Photo Triangle)
- How to understand, adjust and create creative images with Shutter Speed
- How you can move onto Shutter Priority or Manual Exposure Mode without confusion
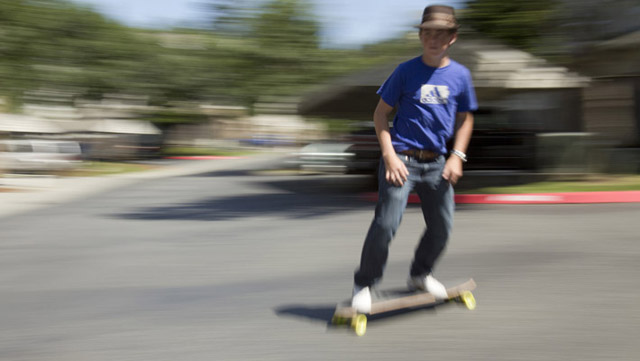
- The pure magic of Shutter Speed in creating Sharpness or Blur when you want it
- 2 Causes of Motion Blur explained – How to ‘use or lose' them for more interesting photos
- The step-by-step guide to the Pan Method for enhancing the sensation of Speed
-
7
White Balance Basics
Video Length: 16 min 08 seconds
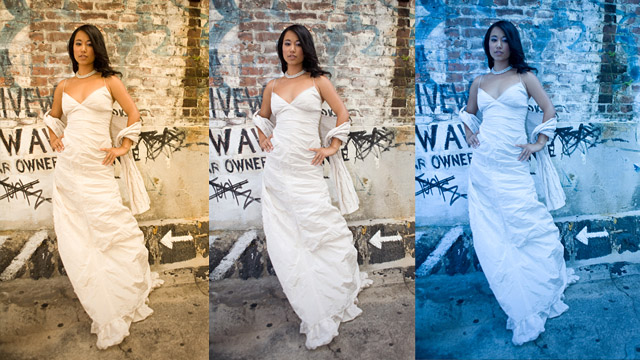
White Balance – the key setting that affects Color (in the LIGHT corner of The Photo Triangle), including:
- What is White Balance and Why do you need to understand it?
- A simple way White Balance Presets can improve your photos instantly
- A little insight into Color Temperature and Kelvin that will help you understand the 'color' of different light sources leading to better color in your photos
- How to Shift White Balance Shift to correct for 'off' color photos
-
8
Custom White balance
Video Length: 16 min 19 seconds
How to use White Balance Bracketing and Set Custom White balance for accurate color:
- How White Balance Bracketing can help you pinpoint the best color for a given scene
- Two simple (yet highly effective) methods of setting Custom White Balance
- How the Color Histogram can unlock the secrets of Custom White Balance
- The single most effective setting to get perfect color in Tricky Situations
- Surprise finding: Why Perfect White Balance is not always what you want!

-
9
Focusing Basics
Video Length: 11 min 25 seconds
Learn the Basics of Focusing including Auto Focus Modes and Manual Focusing (the FOCUS corner of The Photo Triangle
- The most common Autofocus Modes and how they help you
- Why Cross Type Autofocus Points are the best for getting super sharp photos
- The easiest way to control the Point of Focus in your photos using Autofocus Points
- A Hybrid Focus Method that can save you from missing action moments
- How Live View can help you get super sharp focus without guessing
-
10
Depth of Field
Video Length: 12 min 31 seconds
Get more Creative photos by Discovering How to Master Depth of Field (DOF):
- Discover what Depth of Field is and why its crucial to getting Professional looking images?
- The 3 simple (but highly effective) methods for controlling DOF
- How to Isolate your Subject for flattering Portrait Photos using Depth of Field
- How to maximize focus in your scene with Hyper Focal Distance


-
11
Flash Basics
Video Length: 26 min 57 seconds
In this video you will Discover how Flash Photography can raise the level of your photos:
- 3 Creative ways to use Flash to get amazing photos
- How to use Manual Exposure and flash to get the perfect background
- The little know "Flash trick" that can Freeze Splashing Water
- Why First Curtain and Second Curtain Flash firing matters!
- An easy way to get better exposures with Flash Exposure Compensation
-
12
Flash Diffusers
Video Length: 15 min 57 seconds
No more "Deer in the Headlights" Portrait shots by using Flash Diffusers:
- Hard versus Soft Light: The real benefit of Diffusers to your photos
- How Flash Diffusers can give you more Flattering Portrait photos
- How to unlock your Flash photography with off-camera techniques
- Why having the light source (or main flash) slightly from above leads to better portraits
-
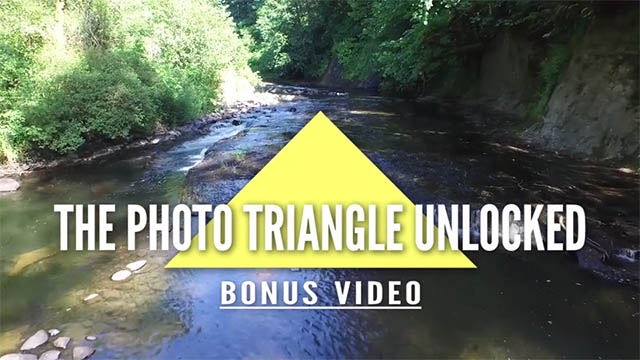
B
The Photo Triangle Unlocked
Video Length: 15 min 57 seconds
BONUS: Discover How The Photo Triangle is used "in the Field", including:
- Simplify taking great photos by knowing the Key elements
- Remember Key Values so you can instantly dial in the settings you need in any situation
- Discover how the Photo Triangle helps you think about taking awesome shots
- This Practical demonstration of the Photo Triangle 'in the field' will help you dramatically improve your photography approach
Here's What You Get with Your GOLD COURSE
Let's get Creative Module
-
1
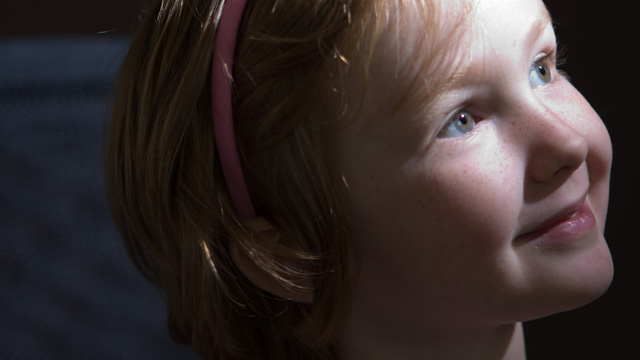
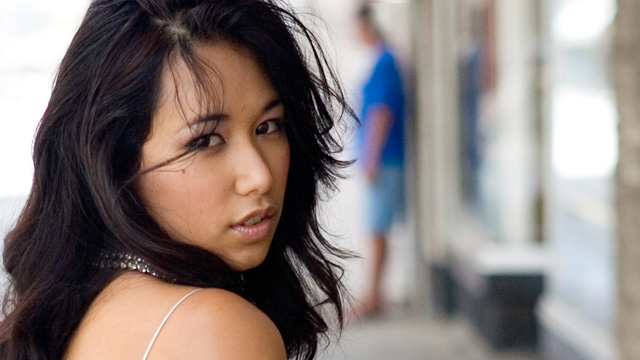
Better Portraits
Video Length: 17 min 14 seconds
Take your Portrait Photos to the Next Level with these Tips:
- Lens Choice and Portraits
- Fill Flash and Diffusers for more flattering lighting
- Introduction to Off Camera Flash
- Clam Shell Lighting
- Window Light - Reflectors vs Flash
-
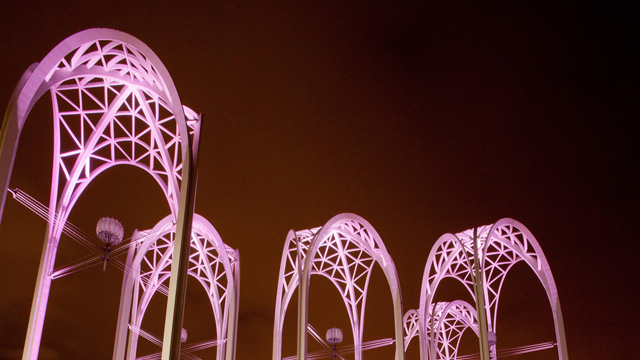
2
Night Photos
Video Length: 11 min 21 seconds
Get Stunning Night Photos with these Tips:
- Why Long Shutter Speeds make great Night Photos
- What ISO settings you should use - Hint: Not high!
- Using Small Apertures for large DOF
- Why Manual Exposure is better
- Creative use of White Balance in night photos
- How to photograph Fireworks
-
3
Nature
Video Length: 21 min 30 seconds
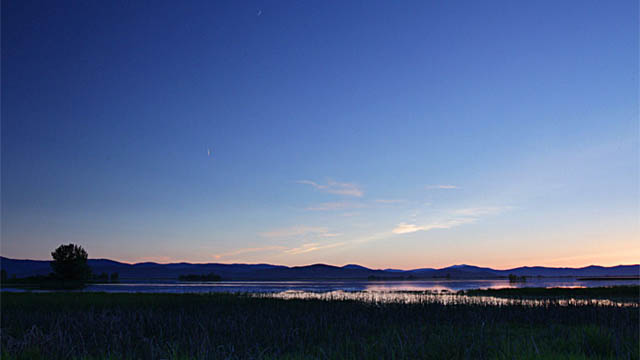
Birds, flowers, landscape, silky rivers and stunning sunsets:
- Using foreground interest in Landscape Photos
- Getting birds 'on the wing'
- The mysterious "Black Card" Technique
- Settings for Silky Water
- Tips for Incredible Sunsets
-
4
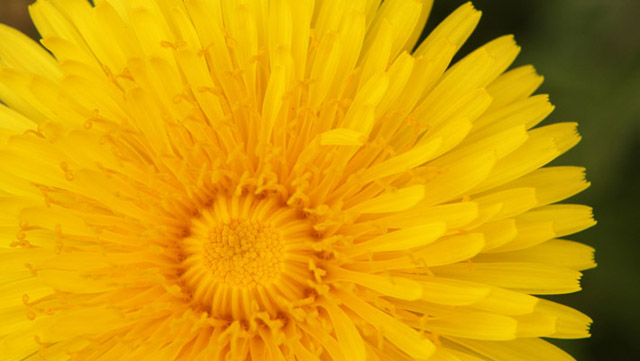
Macro Photos
Video Length: 32 min 58 seconds
Explore the "Tiny World" with Macro Photos:
- How Macro Photography can open up a New World of Photos
- Equipment Options there are for taking Macro Photos (including my favorite)
- Why you need a Tripod for Most Macro Photos
- An essential accessory for making Tripod photos easier
- DOF and Macro shots
- Using Predictable lighting in Indoor Macro shots

-
5
HDR Imaging
Video Length: 41 min 26 seconds
High Dynamic Range imaging explained and demonstrated:
- How to take images for HDRI
- Using Exposure Bracketing or Manually taking different exposures
- HDRI Processing using Photomatix Pro
- When to use HDRI
- Types of HDRI processing and display
-
6
Time Lapse
Video Length: 23 min 49 seconds
Introduction to Time Lapse photography:
- How to set up a Time Lapse sequence
- Essential Equipment for Time Lapse
- Key Settings for Time Lapse sequences
- Tips for Processing your Time Lapse sequences into Video
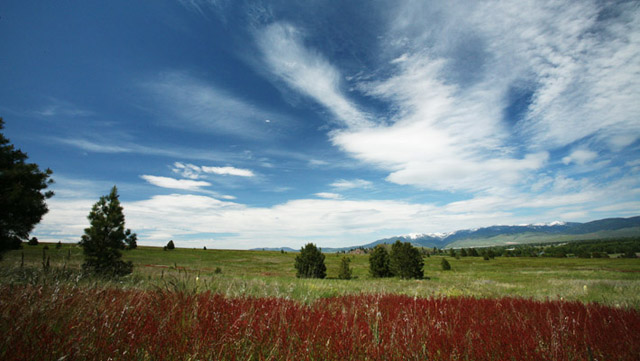
Image Editing Module

-
7
Image Formats
Video Length: 31 min 01 seconds
DSLR image formats explained:
- Introduction to Image Editing
- The 2 Main Image Formats
- What Image Resolution is
- Benefits of RAW Files
- Comparison of JPG and RAW formats
-
8
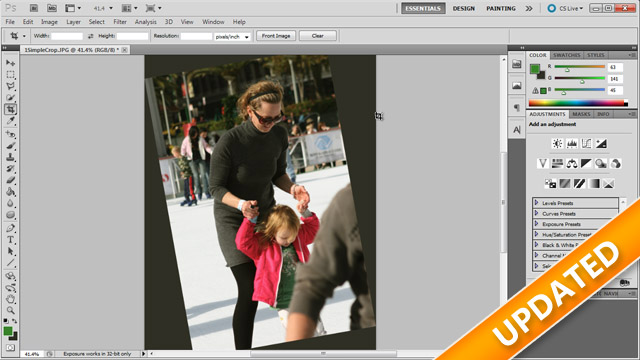
Basic Editing
Video Length: 1 hour 11 min 09 seconds
Basic Image Editing in Photoshop and free editing software, including:
- Improving the Composition of your Photos by Cropping and Rotating
- Adjusting Exposure or Tonal values in Photoshop and free software
- Basic Color Correction of your image
- Quick Red Eye Removal
- Image Sharpening (effectively enhancing Focus)
- Image Blur to simulate Depth of Field
-
9
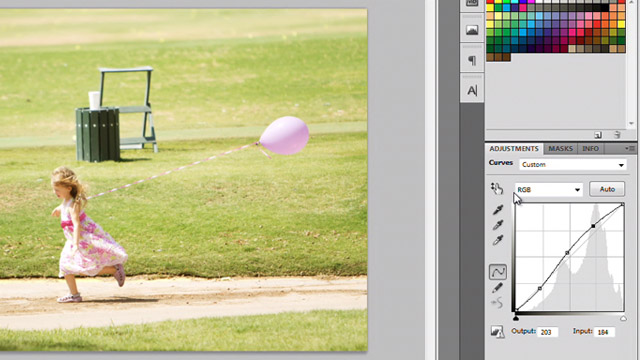
Advanced Editing
Video Length: 51 min 40 seconds
RAW files, Curves, Color Balance and other Advanced topics:
- RAW File editing in Camera Raw (Photoshop Plugin)
- Limits of RAW file recovery
- More Advanced Exposure and Color Tools in Photoshop
- How to fix spots with Spot Healing Brush
- The joys of the Clone Stamp Tool
- Advanced Layer Editing using Layer Masks
-
10
Photoshop Actions
Video Length: 9 min 54 seconds
BONUS VIDEO: A quick Review of Photoshop Actions by Florabella:
- Introduction to Florabella Collection
- What Photoshop Actions can do
- Loading Photoshop Actions
- Setting Button Mode for Photoshop Actions
- How to Apply some Florabella Actions
-
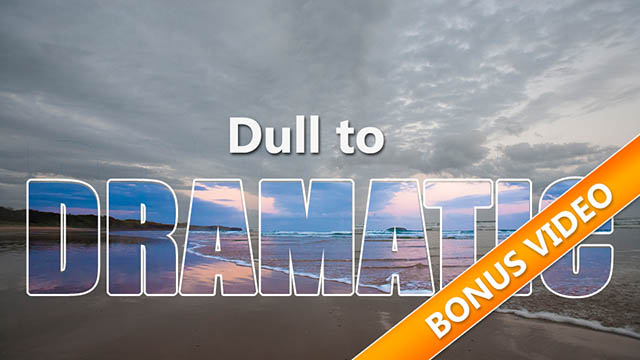
11
Lightroom 4 Tutorial
Video Length: 16 min 23 seconds
BONUS VIDEO: Dull to a Dramatic Adobe Lightroom 4 Tutorial
- Straightening horizon
- Reframing using Golden Mean overlay
- Improving contrast in Develop Module
- Making colors pop with Vibrance, Saturation and Temperature
- Reducing Noise and sharpening
- Adding Drama in the sky with Graduated Filter
DSLR Video Module
-
12
Video Introduction
Video Length: 9 min 48 seconds
Benefits and shortcomings of DSLR Video and introduction to the DSLR Revolution
- Main Benefits of DSLR Cameras for HD Video
- A few Shortcomings of DSLR Video and how they are ovecome
- A brief introduction to the HD DSLR Revolution


-
13
Video Basics
Video Length: 55 min 27 seconds
Basics of how to do DSLR Video:
- Introduction to DSLR Video and how the Photo Triangle applies
- Important Settings for Great Video
- Inexpensive Accessories that raise the level of your Video
- How a Cheap Prime lens can give you awesome indoor footage
- How to get “Film-like” Depth of Field in Bright Daylight
- The One item that gives a Cinematic look to your Video
BLACK FRIDAY SPECIAL
EASYDSLR COMPLETE PACKAGE!
EASYDSLR BLUE COURSE
(Valued at $149)
EASYDSLR GOLD COURSE
(Valued at $67)
INCLUDES THESE 2 AWESOME BONUSES - THIS WEEK ONLY!
BONUS 1: Special Tutorial Video "CONQUERING CHALLENGING EXPOSURE AND FOCUS" (valued at $39)
BONUS Video Lesson ($39 Value)
- Discover BEST Exposure Mode for Tricky Lighting
- How to get the Shutter Speed you want with Consistent Exposure
- Find out how to get Sharp Focus with Action Subjects
BONUS 2: First 500 Buyers receive "ADOBE LIGHTROOM FOR BEGINNERS" Course
BONUS Full Course For first 500 Buyers ($34.99 value)
- LifeTime Online Access to Udemy Hosted Course
- UnCover the Real Potential of Your Photos
Total Price $289.99
includes HD Downloads of ALL VIDEOS
60 Days No Questions Asked Guarantee
I have a No Nonsense Guarantee: If you watch the Videos in this Course and find that either: Your Photos are not Improving through applying what you learn, You don’t like my Accent 🙁 or for any Reason you are not happy with the Course send me an email in 60 Days of Buying and I will refund every cent you payed – no questions asked!
Be inspired with the Key lessons to get more Creative with Your camera...
Reviews From Happy Members
Hi Ken, it was a great day for me when I subscribed to your videos. Your teaching style is fabulous. You present at a pace that is easy to listen to, your whole presentation is fluid and your coverage of a topic is comprehensive and easily understood. Like I said, a great day for me. Thanks
Kerry Feighan EasyDSLR Gold Member
I managed to scrape together enough money for a DSLR camera when my son was born last fall, and although I have a lot of experience with image editing (GIMP), I was clueless with cameras. After stumbling through random and conflicting online resources, my wife bought me your course (both) for my birthday. I really appreciate how you take these concepts and make them simple and approachable, and take the time to go through examples; you are a real pleasure to watch and listen to. You’re a fantastic teacher, and now I am completely in love with my camera…
James Young EasyDSLR Member

Clear concise videos. I really enjoyed this course. It reinvigorated my desire to go beyond the auto menus and gave clear explanations about the technology and terminology of modern DSLR’s. I feel much more confident to try new settings and experiment with flash. Canon users will find it especially useful, as many examples use Canon cameras, but non Canon users will find it equally accessible.
Chris McKernan EasyDSLR Member
I am now in week 4 of the video series and WOW even on the basics I have learned so much. Some of the technical information that I have in the past just glossed over, I now have firmly fixed in my head and photography.
I find the video series very well structured and very well presented. The information is all put across in an easy to follow and understand way even for the least experienced of photographer. It is a pleasant pass time sitting watching these videos and learning at the same time. If I can make one recommendation it would be that every student get a note book and a few different colour pens before you start, you will need them.
Ken thanks for all the hard work you have put into this video series, from my point of view it is well worth it.Colin Meaden EasyDSLR Gold Member
I have previously just messed around with photography, but could never understand f-stops, ISO, shutter speeds, etc, so bumbled my way through on Auto, which was fine, but limiting. I have decided to move into wedding photography, but learning all the technical bits really put me off. I’ve done Ken’s course, and now I get it.
The material is delivered in a clear, easy to understand way. I have just bought a new Nikon D800 – and picked up the manual yesterday – I was amazed at how much I actually understood. I have never even opened a previous manual as it was just too daunting!Kayla Christie EasyDSLR Gold Member

Case Studies of some gold members...
RICH HEALEY
Gold Member
Click below to hear an interview with Rich Healey
Transcript
- Rich
And then there’s another level that takes that basic understanding and gives you opportunities to be more creative. So taking night time photography, night time pictures. Taking time lapse photography. Taking pictures of things super up close - they call that macro photography. You go through the basics, you practice, you have a good understanding and then you go on to the more advances where the real fun begins and you can experiment and try different things.
And then when a period of time goes by where it’s been a while since I’ve done an exposure of the moon for instance. I go back to his video course and I know right where I can find it, and refresh the information and then I’m good to go.
Everything is in one place, I don’t have to fiddle around on the internet looking to find out about night time exposure and a whole bunch of hits and where do I go from there? And then maybe I want to do something for time lapse photography. Everything in one place, follows a nice flow and is not hard to follow.
- SharonSo you said there were special things in the advanced. What kind of special things were there, there? I mean I wouldn’t even know what to think about to ask.
- RichSure, I have his website pulled up here and I’m looking at it so some of the things, portraits for instance and I see a beautiful picture here I’m looking at you here. Somebody took your portrait.
- SharonRight, right.
- RichThere’s a whole technique of how to take good portraits so he covers that gives us kind of an overview of some of the important things about how you take somebody’s portrait.
Night time photography He goes to downtown Seattle and takes some REALLY, REALLY cool pictures. You can’t just do that. You can’t just go down and put it on the automatic settings and say ok I want this picture. So things like night time photography, nature photography, landscape photography beautiful scenes of different venues and all of that. Upclose so you can see pictures of flowers or insects, There was one time after I looked at that I went out the next morning when the, the sun had come up and the dew was on the grass and I set the camera setting to just right and I took a picture of a blade of grass with a drop of dew on the end of it. And when you look at this picture … everything in the background is, is kind of blurry but the picture itself the, the drop of water came out crystal clear and you can see reflections of the blades of grass. And it is it’s just one of my favorite pictures. Again never would have known.

- SharonSounds so cool.
- RichIt just really is cause as I say, it’s all available to you if you know how to use your camera. And by going through that course he shows you those basics and then with the more advanced kinds of things you can do he talks about how you can make that happen. And the other thing too is, you don’t need to have a lot of fancy gear. And that’s always been kind of intimidating to me. You like a really nice picture and you see the people taking them and they’ve got lenses on it three feet long and, and all kinds of things. Thousands of dollars and I figure there’s no way I could take pictures like that. And then he shows you, you really can. And so he takes you through this is what you can do it with and if you want to make it a little bit more and do more things with it then there’s other equipment you could purchase.
I’ve kept a list of “nice-to-have’s” so that when I put a little money away then I will buy a certain type of lens or I’ll buy an extra flash or a filter to go on the camera to sharpen things up on a sunny day. Again the thing I like about the course is after you look at the features of a particular lesson you go right out, you can use the information right away and you can see the results and you don’t have to have a lot of fancy camera gear if you don’t want to.
- SharonWere there any ways that he exceeded your expectations? Because it sounds like he met them.
- RichYes. One of the things I reflected about that I thought was different than any other course that I’ve seen is he goes into a little bit more in depth about, about how things happen. He doesn’t just say ok this setting will allow you to do this. He goes into a little bit more explanation about why that setting allows you to do this. One example would be there’s a thing in photography called white balance. Sun shines provides one kind of light. A florescent light provides you with a different kind of light. And you have to understand that a little because when you take a picture of something, if you get it in the sunlight, the color white is going to look a little different than florescent bulb. Ok? So he goes into explanation about why that is and how you can adjust for it so you get a true picture of a true white color regardless of what your light source is. Or that idea I was mentioning the background, you can either have blurred, which is favorable if you want to focus in on one subject like a portrait, or maybe you want the background to be in focus. Give you perspective. And a great, great picture of my son playing soccer and a picture of him taking a shot at the goal and you can see the goalie hit it his hands are out, two defenders are next to it and you can just see this ball is gonna go in the net. It looks like he‘s about five feet away from the goal but in reality he was about thirty feet away from the goal. And you can see in the background everything is pulled more closely because of the lens I was using. So I was able to achieve this because of some of the information that Ken had talked about. He goes into a little bit more in depth, a little bit more of the science behind why things are the way they are. And I’m interested in that and it helps when you remember what should I be thinking about when I’m trying to achieve a ….. picture.

BEFORE EasyDSLR - Some shots Rich was having trouble with::


AFTER EasyDSLR - Photos Rich is proud of:


ANDY ROSE
Gold Member
Click below to hear an interview with Andy Rose
Transcript
- AndyYeah, it all started in me looking around for DSLR camera for the family for holiday pictures and general pictures and stuff and I didn’t know a lot about it and I don’t know how I came across it but I found Ken’s DSLR guide online and I managed to download it and have a look through the DSLRs on the guide and so I picked the DSLR that we could kind of afford. I think I email Ken about it at one point as well and he emailed straight back which was sort of really cool and I found that really helpful.
- Dr. SharonWhat did you email him about?
- AndyWhat his thoughts were on the camera obviously he had put it in the buyer’s guide but I just, obviously before shelling out that amount of money, I just wanted to sort of make sure I was making the right choice.
At which point I followed up online to his website from that email address and which was I think the photography side not the DSLR, the DSLR course which then sort of got me onto the course.
I had ordered the DSLR and all that kind of stuff and didn’t really know what I was doing with it and just assumed I would get good photos because it was a good camera .
At which point I sort of thought "Well I am investing all of this money in a camera I want to start investing in some means of training to kind of get me through it".
So I had a look online and followed up on Ken’s e-mail and I found the course and looked across a couple of the introduction videos on his website which were free and just found personally that it just kind of was my learning mechanism, it was how I took things in.
So looking at it on a video. I am not the sort of person who can read a book or anything like that I'm very hands on and just sit with my camera in front of a computer and watch a video of somebody showing you how it works and in particular that the camera that Ken showed you on was the one I had which was really cool.
It was just really easy application.
He had it there you had it in your had as well, you could just dial up the settings and take some really practical examples and I think that is what it's kind of based on really.
It’s a practical kind of course - visually based
So that's how I learned. So I am only about 3/4ths of the way through the course at the minute but I have just found Ken sort of dedication to the course just brilliant.
It's great how he has got, underneath every video he has got a comment section, he personally responds to every single comment and I have e-mailed him aside from the course just asking him advice on things and he has e-mailed straight back. He's just a really great guy and really helpful.
I just personally feel that without this kind of course that I had done, had I just gone down the route of buying the DSLR and under the assumption that I would get good photos without this additional training, I wouldn’t be in the place that I am now having come back from Disneyland and got stacks of great photos of the family - you know.
So I look back and feel I owe to Ken for that. Just really positive stuff.
- Dr. SharonAre there a couple of things that you have learned that stick in your mind like "oh wow" that was really useful or that made a difference?
- AndySo many things, on the bottom of every video I think I put a comment on there or a question and just saying how great that was and just how I have never thought about it that way before, I always thought about certain things a certain way and just how we explained it and referred to certain aspects of the camera and the settings that were just kind of:
"Oh! that is really simple but I never thought about it that way before" if you see what I mean.
- Dr. SharonCan you give me an example?
- AndyI guess something about Aperture on the camera. Just kind of how he utilized that, I understood the basics of it, but kind of in the Depth of Field side of things trying to get better photography with a number on the aperture to kind of create a wider in-focus area on the screen.
Because I had only done sort of half the course when we went away to Disneyland and I found myself using, tending to mess about with the shutter speed a lot and not tending to touch the aperture setting.
But then, towards the backend of the course I kind of started messing about with the aperture and actually seeing the results of that.
- Dr. SharonDo you have any pictures you are particularly proud of that you could share?
- AndyProbably, given that I came back with 6,000!
- Dr. SharonOh my goodness! Oh my goodness!
- AndyYeah, which Ken's also referred me onto a guy called Phil Steele who does a course on Adobe Lightroom which has also been really helpful to sort of work with your photographs because there are so many of them, it’s a bit of a nightmare to try and filter them down to a manageable quantity.
- Dr. SharonVery very cool.
Anything that I left out that you might want to tell people if they were considering taking Ken’s course?
- AndyFinancially, you are spending in excess of 1,000 pounds on a camera.
You spend what 50-60 pounds on the course?
I mean that’s really nothing... compared to the results that you get from using the camera.
So if you buy the camera on its own and you don’t do this course I am thinking; my example, if I just bought the camera and not done the course I think I would be in a very different position now to what I am having done the course and seeing all the rewards from that...
BEFORE EasyDSLR - Some shots Andy was having trouble with:


AFTER EasyDSLR ** insert Drum-Roll ** Some Awesome shots Andy is proud of:


SHARON LEACH
Gold Member
Click below to hear an interview with Sharon Leach
Transcript
- Dr. SharonSo I was wondering, how did you come to the course? Why were you interested in taking that course anyway?
- SharonWell I’ve always enjoyed photography and two years ago I decided to really get into it and try to understand it more. My husband bought me a new DSLR camera and I wanted to know how to work it besides automatic. (laughs) So I looked on the internet and came across Ken’s class and decided to purchase it. Of course I bought the other program too, the gold, as I got more into photography, and really enjoyed it. The first video that I saw which was free, I really enjoyed what I saw of it.
- Dr. Sharonyou know I’ve never seen it. What does it show?
- SharonThat was a long time ago. It’s been two years since I watched that one. I think it was on depth of field is what it was if I remember right. And just the aperture part of it. Of course at that time I didn’t understand a thing, so I knew that he was going to explain… as well as he explained that portion of it, I knew that I could learn from him. And I did. I learned volumes from him.
- Dr. SharonWhat kind of things? I’m not a photographer so what kinds of things did you learn?
- SharonOh ok. Well I learned… a lot of it is still a little bit over my head but I learned what the aperture was, what shutter speed was, and depth of field. A little bit of Photoshop not a lot. I hadn’t gotten Photoshop the time I watched his video so I didn’t watch that one real closely which I want to go back because I finally got a Photoshop program. Just the basics of how the camera works and how to work with lighting and especially with manual and how to get the exposure that you want to get of each picture and just like I told Ken I was like a sponge and I was just taking it all in. I learned a lot of the basics but he went beyond that as far as the lighting and the depth of field and getting bokeh and all of that. It was just fascinating to me.
- Dr. SharonWhat’s the value of that in terms of your photography?
- SharonThe value of it for me is I’ve always been a point and shoot camera type person. And when I got my DSLR I decided right away that I wasn’t going to be that way with that camera because I knew it could do so much more. He didn’t really go into another lens but his portrait photography I wanted to get more bokeh in a lot of my pictures so I bought just a 50 mm lens cause of the f-stop on that, and that’s with the aperture, the f-stop on that was a lot higher. I get more bokeh in the back of my pictures and I really can’t put any value on it other than it just helped my photography so much so quickly I guess you could say. It was really amazing to me because I would talk to other photographers and how have you done this and I said well I’m just learning. I’ve only been in it for about a year. They’re really quite amazed that I knew as much as I did and I said well I just took a class and I think the guy that taught it was so informative and did such a wonderful job. That’s how much I value it. really it just helped me leaps and bounds and I’m just taking it and just ran with it.
- Dr. SharonWhat is it about the way Ken teaches?
- SharonI think for me I learn by seeing. I’m not a reading person. I have to actually see what you’re doing. With his videos he would go out in a field and actually explain to you and show you exactly what he was doing and what the cam and what kind of picture you were going to get doing this shutter speed and this aperture and this exposure and everything and this depth of field and so for me to actually see it helped me immensely and he explained it so well. So that’s what helped me was actually seeing the video and I learn by sight I don’t learn by people telling me.
Obviously there’s both but I learn a lot faster and lot better if I can actually see what’s going on. Rather than read it then try and work with it.
- Dr. SharonWhat is it about taking pictures do you think?
- SharonOh man it’s just so rewarding I just love it. I get out there and take pictures of birds and I do macro photography and just to see sunsets I absolutely love sunsets. And to see the picture that you can… and just the creativity of it all. Of getting shadows and in different pictures that you can just capture and you can show to people and say this is what you miss. A lot of people, we don’t
sit there and look at a sunset. We don’t sit there and look at how different lighting works when the sun hits this area you got shadows and it does different things I guess it’s like capturing a bird for me It’s just fascinating. And I love birds. And dogs I love taking pictures of my dogs and seeing if you can get the expression and how it comes through the picture and getting the emotion that comes through it I think. It’s just fascinating to me. I have never always been this way I’ve never thought of myself as a creative person. And my brother who just recently got into photography was a painter growing up and he was very creative and he was kind of surprised that I was into photography because I have never been a creative person. And he says but I see you talking about it and you really do have a creative eye for it and he says I just would’ve never thought that you would. (laughs)
- Dr. SharonHow cool is that? Wow.
- SharonYeah I thought it was pretty cool. So I guess for me it’s just a different kind of creativity and art. To see different things is so neat. And how other people look at different things. I see pictures of what other people take and I think, Hmm I’ve never seen it that way. And it just kind of tells a story and it’s fascinating to me.
- Dr. SharonAnd so if you were going to be describing this program to a friend who was interested what might you say?
- SharonYou really want to know how your camera works and all that it does. I would highly recommend Ken because he explains it so well. But I think the first thing I would tell the person is to go ahead and look at the first video that he has for free. And if it appeals to you and how his teaching method is, I would go. Like I say people just learn so differently. And for me with how he had the charts and everything and the way the coloring and everything I really wanted to know the basics. I come across a lot people and they just want to take pictures. And I wanted to know why that picture was coming out that way. And so I guess it depends on why people are taking pictures. Is it just cause they want to take pictures of their family or whatever,. I wanted to go deeper than that and so if I were to talk to somebody about the program I would say If you really want to learn how to do photography I would highly recommend this program to you. His videos.
BEFORE EasyDSLR - Some shots Sharon was NOT happy with:


AFTER EasyDSLR - Photos Sharon is Super Happy with 🙂


CHRIS ELLIS
Gold Member
Click below to hear an interview with Chris Ellis
Transcript
- ChrisFrom a user’s standpoint, I guess all I did is just kinda start going through ‘em all. And I’m one these type of people that um, you know, I don’t do a video and then practice for a week. I’m more of the type that okay I heard that and now lets go to the next thing and keep going, and going, and going and then along the way um so anyways I kinda blew through these courses within, Oh man, probably three or four days and then you start going out and experimenting and doing these things and , you know, go back to them as a reference at that point so it kinda built up all the knowledge as much as I possibly can, go out put it to practice and then come back as a reference. So thats really what I do right now with it, just so you know.
- KenYeah
- ChrisUm, and I think a lot of people are probably that way too. Um, but anyway, so I mean just the way you put things and explain them um I mean this is awesome and it really is. Just, you know, the structure you have for it all any everything. Um, in terms of the photography stuff you know a lot of this, well and once again you know I’m a beginner at it obviously, and so I went out and got a Nikon D7100 and you know was like, you know, well I had a DSLR before that an old Cannon Rebel EOS
- KenUh huh
- Chris… and then so I really, I really stepped it up going to the Nikon D7100 and I was like “you know I really need to be more serious with this, I know I can do it, um you know and but how?” You know,like, what is composition - what is all this stuff? I don’t know, you know what I mean, so I can go out and take a picture but didn’t really, you know, know a lot until then. So like the rule of thirds, all those things uh I put into practice on virtually every picture that I take. And so whats nice about that camera you can have your grid uh show up right there in your viewfinder, get it in a nice ballpark, and then once you go on to your photoshopping and things like that, you know, turn the rule of thirds on there and crop it just the way you want it. Get that, you know, get that flow that you’re going after. And so it tremendously improves what I can do - no doubt about it. So the, you know, that whole aspect was just a big, big eye opener for me - no doubt about it. So I know how to work the buttons and I know what aperture is. I know what this is and , you know, how shudder speed affects other things and uh but “how do I use that?”. And thats where your courses really came in handy to me. It put it into more of a practical sense um definitely with the photography.
- Kenokay
- ChrisUh the time-lapse photograph, the time lapse photography was probably my, one of my favorite parts I’ll be honest.
- KenOK, yeah
- Chris…so I never knew how to do a time-lapse and that was pretty cool. So now I can get these cool sunsets coming across our house here uh so that was fun.
Some of Chris's recent shots


BLACK FRIDAY SPECIAL
EASYDSLR COMPLETE PACKAGE!
EASYDSLR BLUE COURSE
(Valued at $149)
EASYDSLR GOLD COURSE
(Valued at $67)
INCLUDES THESE 2 AWESOME BONUSES - THIS WEEK ONLY!
BONUS 1: Special Tutorial Video "CONQUERING CHALLENGING EXPOSURE AND FOCUS" (valued at $39)
BONUS Video Lesson ($39 Value)
- Discover BEST Exposure Mode for Tricky Lighting
- How to get the Shutter Speed you want with Consistent Exposure
- Find out how to get Sharp Focus with Action Subjects
BONUS 2: First 500 Buyers receive "ADOBE LIGHTROOM FOR BEGINNERS" Course
BONUS Full Course For first 500 Buyers ($34.99 value)
- LifeTime Online Access to Udemy Hosted Course
- UnCover the Real Potential of Your Photos
Total Price $289.99
includes HD Downloads of ALL VIDEOS
THE BENEFITS OF ONLINE TRAINING

Instant Updates
Any updates to Course material are instant

Lifetime Membership
No Hurry – Work at your own pace

HD Downloads
Convenient HD Video Downloads

Watch on your Devices
Access via Computer, Tablet or Smartphone
As seen on: